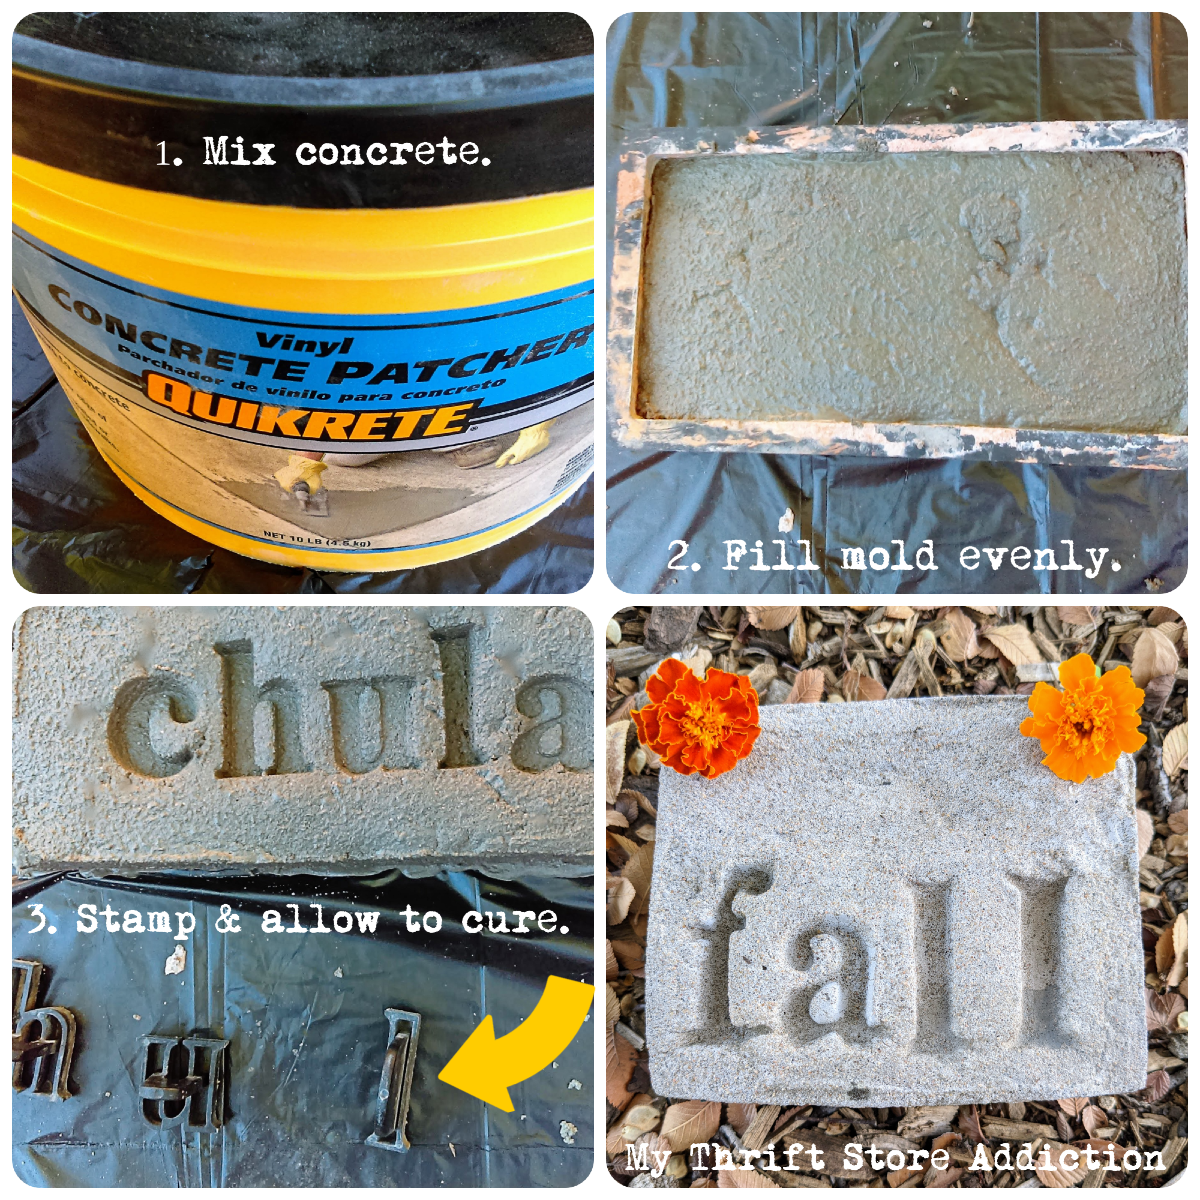
Happy Monday, Friends! Stamped concrete is the perfect project to get done during the crisp, fall weather before the temps drop too cold. Today I'll show you to stamp concrete using molds and letter stamps plus tips for curing it...

Here's what you'll need:
Quikrete vinyl concrete patcher
Concrete trowel
This concrete patcher creates a smoother look than regular bags of concrete and it's also available in smaller bags. The amount of concrete that you will need will depend on the size of stone you want to make, but start with 5 parts concrete to 1 part water, adding the water gradually and stirring continuously as you would if you were making frosting. Next, place the mold on top of a heavy duty garbage bag and pour the concrete inside the mold, smoothing it evenly with a trowel.

This post contains affiliate links for suggested supplies. See full disclosure here.
After the concrete thickens, but before it dries, gently press the letter stamps. Last, ever so carefully, remove the mold. Curing: After the stone has dried overnight, mist with water for up to a week to hasten curing of the concrete.


HONORED TO BE FEATURED HERE:


Lovely job! I would label an herb bed, make Halloween headstones, mark pet graves,...so many ways to use these!
ReplyDeleteThis is so creative I love it! :)
ReplyDelete